Walk-in shower: ultra-low-profile shower tray or tiled floor – which should you choose?

The two options for a walk-in shower
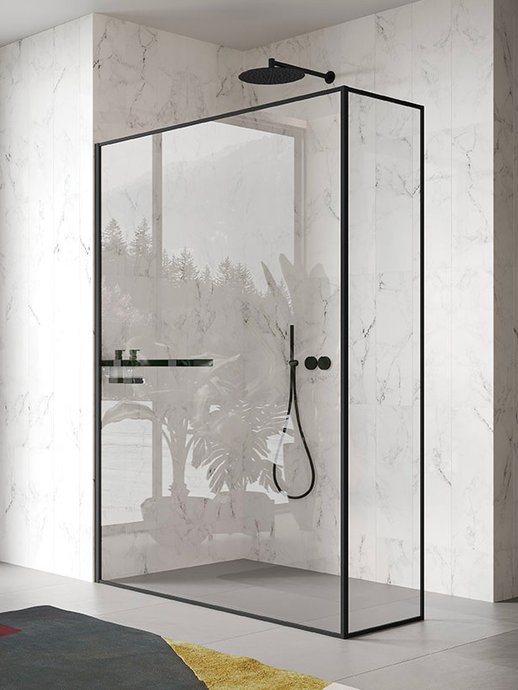
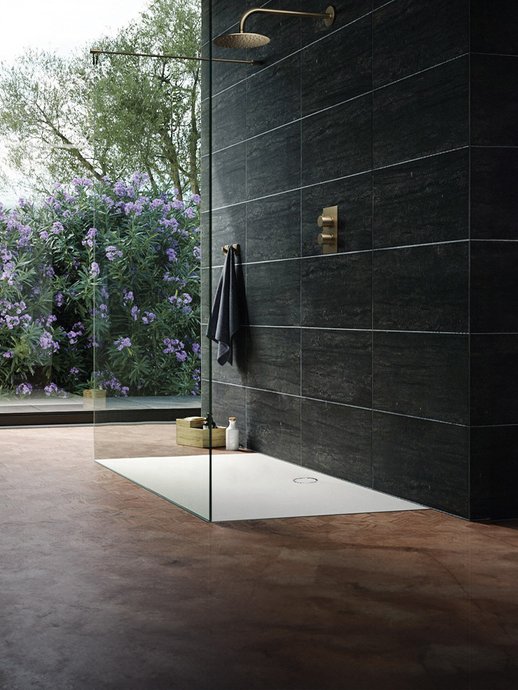
Create a walk-in shower that combines style and accessibility thanks to two main solutions: a tiled screed and an ultra-low-profile shower tray. The latter, measuring just 3 to 5 cm thick, stands out for its quick installation and safety. The tiled screed, meanwhile, allows for complete customisation and integrates perfectly into your architectural project.
Each option has its own advantages depending on the installation, maintenance and the desired end result. Are you unsure which of these two approaches to choose? We can help you make the right decision by comparing their specific features, so you can identify the solution best suited to your situation, whether it’s a quick renovation or a fully bespoke fit-out.
The extra-flat shower tray: definition and principle
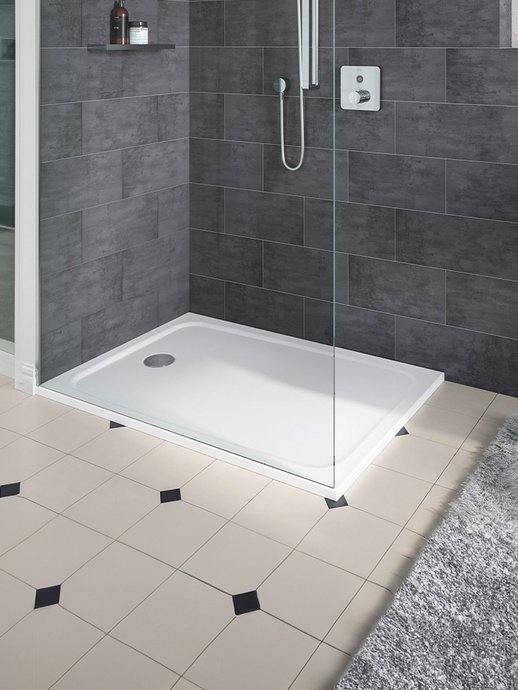
The ultra-slim shower tray is between 3 and 5 cm thick. This pre-formed base ensures water drainage and watertightness thanks to its one-piece design. Made from resin, ceramic, acrylic or reconstituted stone, it combines strength with lightness. The non-slip resin models meet accessibility standards for people with reduced mobility.
The factory-machined slope, calculated to the nearest millimetre, eliminates any risk of water pooling. Optimal drainage towards the drain is thus guaranteed right from the manufacturing stage. Installation is quick and easy on a prepared floor, with no major building work required. A simple levelling compound or a few millimetres of screed is all that is needed to accommodate these ultra-flat trays. Connection to the drain takes just a few hours.
Tiled screed: a traditional technique
A tiled screed is the standard approach for walk-in showers, particularly on concrete slabs. This technique requires greater expertise: creating a sloped screed, applying a complete waterproofing system, and then carefully laying the tiles.
The standard mix consists of 1 part cement to 3 to 4 parts clean 0/4 sand, with a water-repellent additive added in accordance with the manufacturer’s recommendations. The thickness varies from 4 to 6 cm, being reduced around the drain. The semi-dry consistency resembles damp sand rather than liquid concrete. A 2% slope is formed using a straight edge during levelling. This method offers complete customisation and an elegant finish, but requires specialist expertise to ensure perfect waterproofing and a precise drainage slope.
Installation and necessary work
Installing an ultra-low-profile shower tray: a step-by-step guide
First, prepare a perfectly flat and stable surface. Mark the position of the drain plug beneath the drain outlet, then connect the trap to the drain pipe with a slight slope to ensure proper drainage. Allow for a clearance height of at least 60 mm to accommodate the drain plug and the drain outlet.
The shower tray is fully bonded to its base using parallel beads of polyurethane sealant. Check that it is level using a spirit level before the sealant sets. A waterproofing strip is fitted between the floor and the wall before final bonding, and a foam seal is inserted between the shower tray and the walls to ensure a perfect watertight seal.
Laying a tiled screed: a technical project
Tiled screeds require greater technical expertise. Start by excavating and cleaning the substrate, then apply a waterproofing compound to the floor and walls, paying particular attention to the joints. Next, lay a waterproofing membrane beneath the shower area before installing the pipework, ensuring the correct gradients are maintained.
The shower tray must be installed with a minimum gradient of 1 cm per metre, or 1%. The screed is poured using spirit levels to ensure the correct gradient is achieved, with a minimum thickness of 4 cm. Once completely dry, a new protective coating is applied before the tiles are laid.
Completion time and professional assistance
The timeframes vary considerably depending on the solution chosen. A traditional 4 cm screed requires around four weeks to dry before tiling, whereas an ultra-thin shower tray can be installed in just a few hours.
In both cases, call in a professional: the assistance of a specialist is essential to ensure a proper seal.
Maintenance and durability
Easy to maintain on a day-to-day basis
Maintaining resin shower trays is straightforward: regular cleaning with a mild detergent and a sponge is all that is needed. The resin is resistant to common chemicals, stains and scratches.
Tiles require more thorough maintenance. Grout lines tend to accumulate dirt and mould, so they need to be scrubbed regularly with soapy water or white vinegar. Limescale builds up quickly on tiled surfaces and requires specific limescale removers.
Lifespan and durability
A walk-in shower that is well maintained has a lifespan of 20 to 30 years. Resin shower trays offer long-lasting durability, capable of withstanding daily wear and tear and impacts. This longevity justifies the initial investment, particularly if you value ease of maintenance.
Which option is right for you, given your circumstances?
Quick renovation: the extra-flat shower tray
Give your bathroom a makeover without major building work! The ultra-slim shower tray is your best friend when digging up the floor is impossible or too expensive. You keep the existing floor slab and avoid complications. This solution can even be installed over old, stable tiling, thus eliminating the need for any building work.
Bespoke project: tiled screed
Do you dream of a unique shower? A tiled subfloor offers you complete creative freedom. Blend the floor of your shower seamlessly with the rest of the room. This technique is particularly effective in unusual layouts where every centimetre counts.
Accessibility for people with reduced mobility and safety
Accessibility requires tailored solutions. The extra-low shower tray makes access easier thanks to its 4 cm step and non-slip surface. Ensure you adhere to the minimum dimensions of 1.20 x 0.90 m for a disability-accessible shower.
Style and aesthetic customisation
Your choice influences the atmosphere of your bathroom. The extra-flat shower tray defines the space through its decorative contrast. The tiled surround visually extends the floor tiles into the shower area, creating perfect aesthetic continuity.
Comparison table: extra-shallow shower tray vs tiled screed
| Criterion | Extra-shallow shower tray | Tiled screed |
| Thickness | 3 to 5 cm | 4 to 6 cm |
| Materials | Resin, ceramic, acrylic or engineered stone | Cement (1 part) + 0/4 sand (3–4 parts) + water-repellent agent |
| Flow gradient | Machined in the factory to the nearest millimetre | 2% (1 cm per metre), measured manually with a ruler |
| Complexity of installation | Simple and quick to install on a prepared floor | Technical, requiring professional expertise |
| Installation time | A few hours | 4 weeks (allowing the screed to dry before tiling) |
| Interview | Simple: mild detergent and a sponge | High maintenance: frequent cleaning of the joints, limescale-removing products |
| Resistance | Resistant to chemicals, stains and scratches | Seals accumulate dirt and mould |
| Best use | Quick renovation, non-excavable ground | Bespoke projects, non-standard configurations |
| Accessibility for people with reduced mobility | 4 cm step (reduces the strain) Non-slip surface | Maximum protrusion of 2 cm possible Minimum dimensions: 1.20 x 0.90 m |
| Key benefits | Speed, safety, easy installation, guaranteed watertightness | Complete customisation, architectural integration, aesthetic harmony |
| Main drawbacks | Limited customisation | Time-consuming to complete, requires specialist knowledge, and is high-maintenance |
Our verdict: which solution is best for your walk-in shower?
Your choice depends above all on your specific circumstances. Do you want to renovate quickly whilst keeping costs under control? The ultra-slim shower tray is the obvious choice, with its simple installation and guaranteed safety. Do you prefer a fully bespoke design? A tiled shower base offers you complete freedom to achieve the look you want.
The ultra-slim shower tray is all about speed and convenience. The tiled screed ensures a bespoke fit. Both solutions offer a similar lifespan of 20 to 30 years.
Consider your priorities, which will help you find the solution that best suits your needs.
Frequently asked questions
Q1. Which material is best for a walk-in shower tray?
Mineral resin or engineered stone shower trays offer the best balance between durability and aesthetics. These materials are resistant to chemicals, stains and scratches, whilst guaranteeing a lifespan of 20 to 30 years with regular maintenance.Q2. What are the drawbacks of a tiled shower tray?
The main drawback is the maintenance of the grout lines, which quickly accumulate soap scum, limescale and mould. Furthermore, the installation process takes longer, requiring several days to complete the waterproofing, tiling and finishing work.Q3. Does a walk-in shower necessarily require a shower tray?
No, a walk-in shower can be installed without a traditional shower tray. In this case, the tiles or mosaic laid directly onto a sloped screed act as the shower tray, creating a seamless surface with the rest of the floor.Q4. How long does it take to install each solution?
An extra-flat shower tray can be installed in just a few hours, whereas a tiled screed requires around four weeks to dry before the tiles can be laid, plus the time needed for waterproofing and finishing work.Q5. Which solution is best suited to a quick renovation?
An extra-low shower tray is ideal when excavating the floor is impossible or too costly. It allows you to modernise the bathroom without touching the existing floor slab and can even be installed over stable existing tiling.